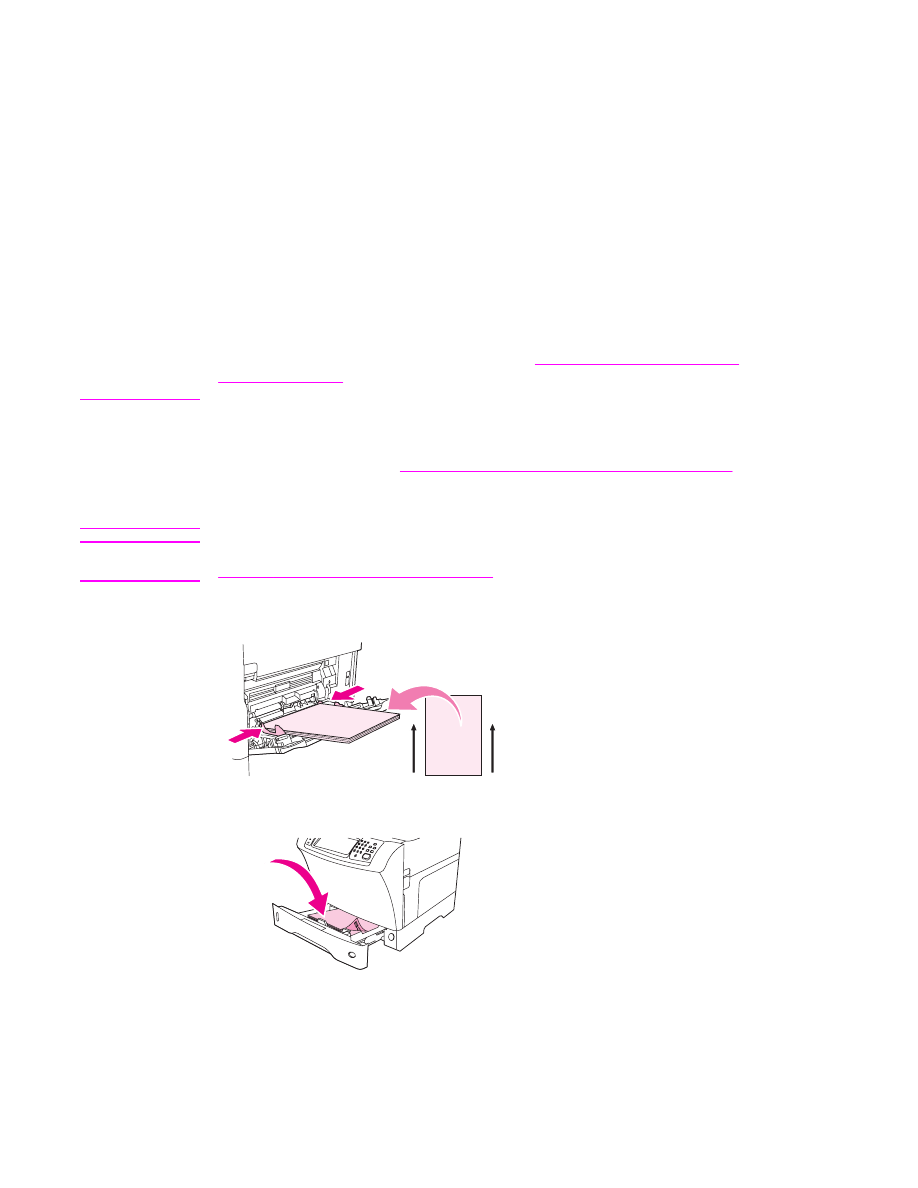
Printing on transparencies
Use only transparencies that are recommended for use in laser printers. For transparency
specifications, see
Transparencies
.
●
At the MFP control panel, open the CONFIGURE DEVICE menu. On the PRINT
QUALITY submenu, select FUSER MODES. Make sure that the fuser mode is set to
TRANSPARENCY=LOW.
CAUTION
Failure to set the fuser mode to LOW can permanently damage the MFP and fuser.
●
In the printer driver, set the paper type to Transparency.
●
At the MFP control panel, open the PAPER HANDLING menu. Set the tray type to
TRANSPARENCY for the tray that you are using.
●
Load transparencies face up in tray 1 with the top toward the MFP. Up to
50 transparencies can be loaded in tray 1.
●
A stack of up to 100 transparencies can be printed from tray 2 and the optional trays
(although stacking more than 50 at a time is not recommended).
●
Because transparencies are heavier than paper, do not load trays to maximum capacity.
ENWW
Printing on special media
81

●
Load transparencies in tray 2 or the optional trays with the side to be printed on facing
down, and the top, short edge toward the right.
●
To prevent transparencies from becoming too hot or from sticking together, remove each
transparency from the output bin before printing another.
●
Print on only one side of a transparency.
●
Place transparencies on a flat surface to cool after removing them from the MFP.
●
If two or more transparencies feed at the same time, try fanning the stack.
●
Do not feed transparencies through the MFP more than once.