Clearing jams from the fuser
Use this procedure to clear jams that occur in the fuser.
To clear jams from the fuser
1. Turn the MFP off and wait 30 minutes for the fuser to cool.
WARNING!
The fuser is very hot. To avoid minor burns, wait 30 minutes for the fuser to cool before
removing it from the MFP.
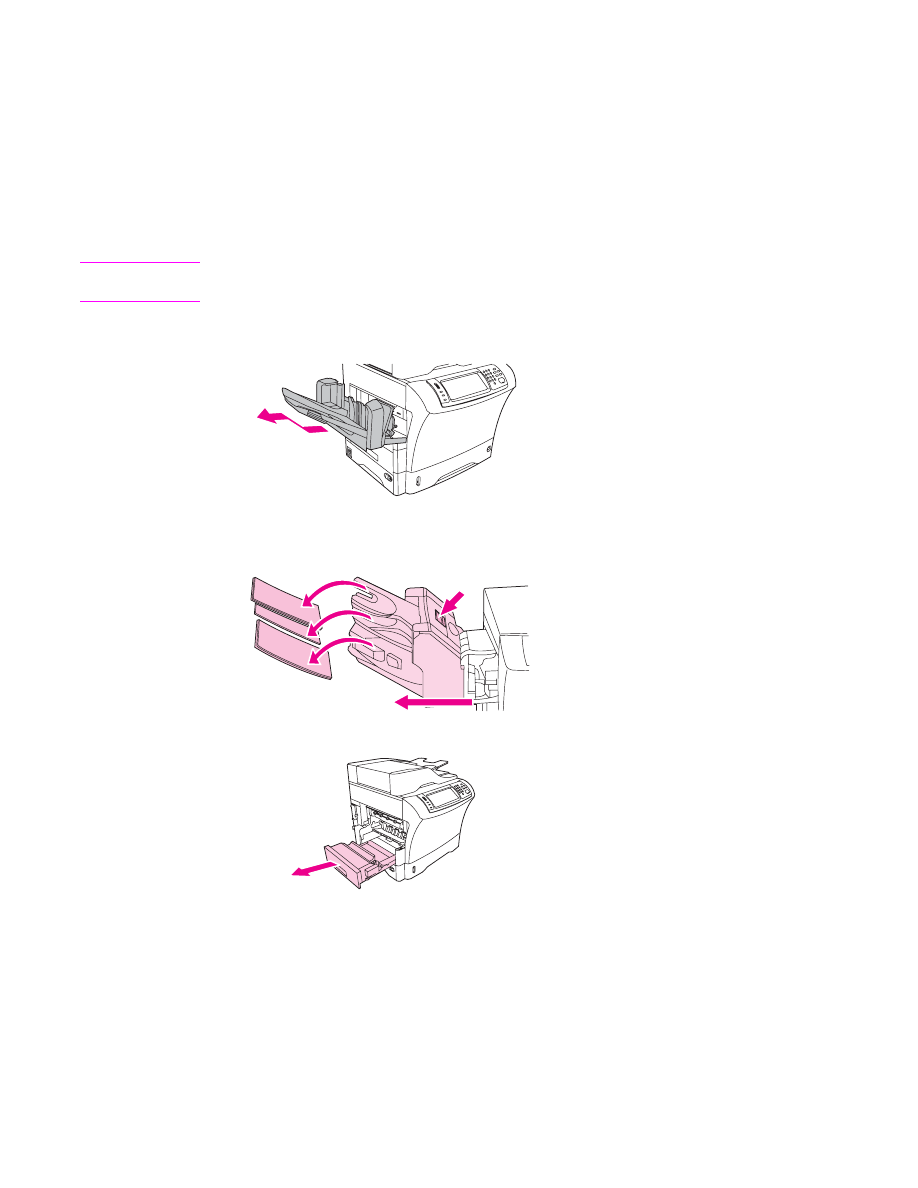
2. If you are using the standard output bin, grasp the handle at the bottom of the output-bin
assembly, and pull it out and then up to remove it.
3. If you are using a 3-bin mailbox or a stapler/stacker, remove any media that is stacked,
and then press and hold the release button on the top of the device. Pull the device
away from the MFP.
4. Remove the optional duplexer or the duplex cover.
5. If you cannot see the jammed media inside the fuser, skip to step 9.
ENWW
Clearing jams
195
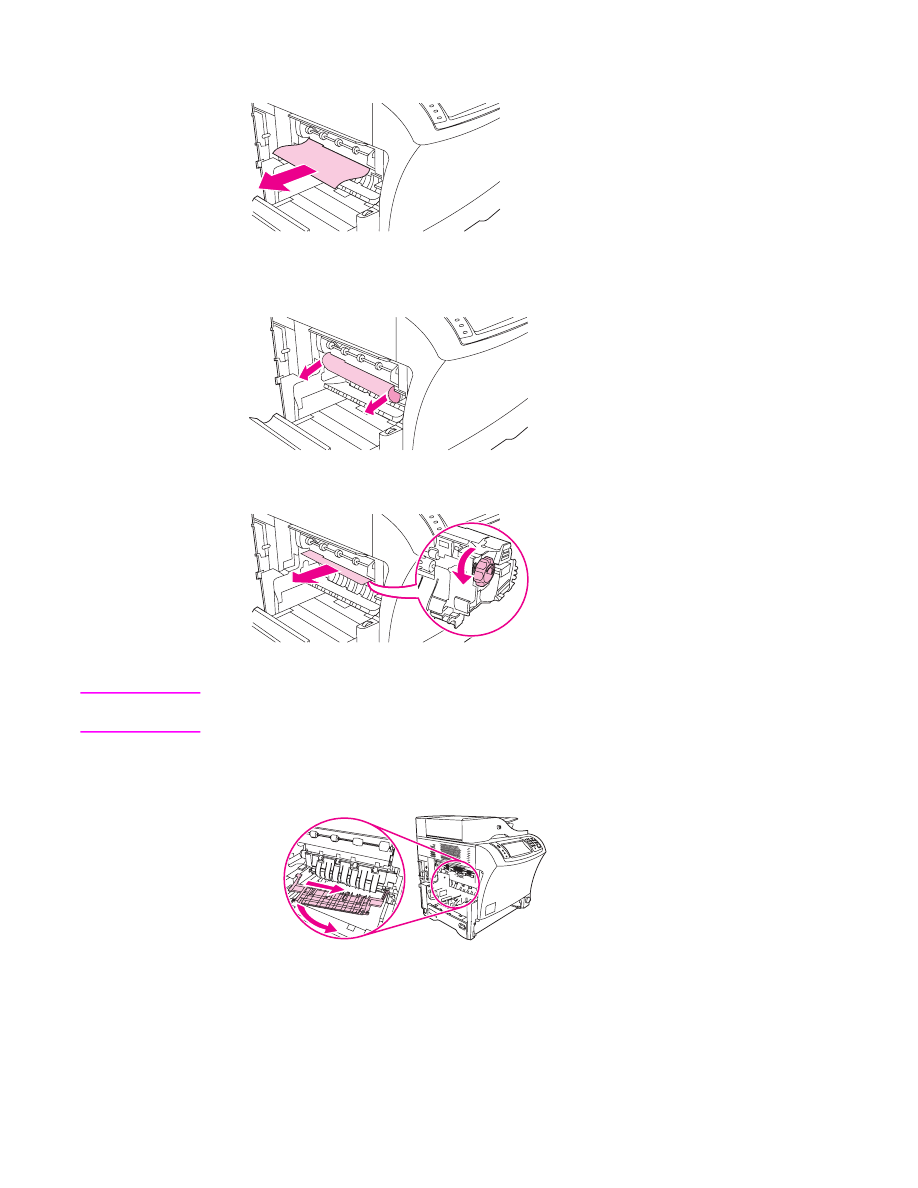
6. If you can see either the leading edge or the trailing edge of the jammed media inside
the fuser, carefully pull it out.
7. If you can see the jammed media, but neither the leading edge nor the trailing edge is
visible, gently pull on the sides of the sheet of media until one edge becomes free. Then
carefully pull the jammed media out of the fuser.
8. If the media tears as you are removing it, turn the green dial on the fuser, and then
carefully pull out the jammed media. Go to step 13.
9. If you cannot see the jammed media inside the fuser, you must remove the fuser.
WARNING!
The fuser is very hot. To avoid minor burns, wait 30 minutes for the fuser to cool before
removing it from the MFP.
a. To remove the fuser-entrance guide, push inward at the left edge to free the left-side
alignment pin. Then lift up slightly on the fuser-entrance guide, and remove it from
the MFP.
196
Chapter 10 Solving problems
ENWW
b. Place your forefingers on the blue levers on the bottom of each side of the fuser.
Place your thumbs on the grip points on the top of each side of the fuser. Squeeze
the blue levers up, and remove the fuser from the MFP.
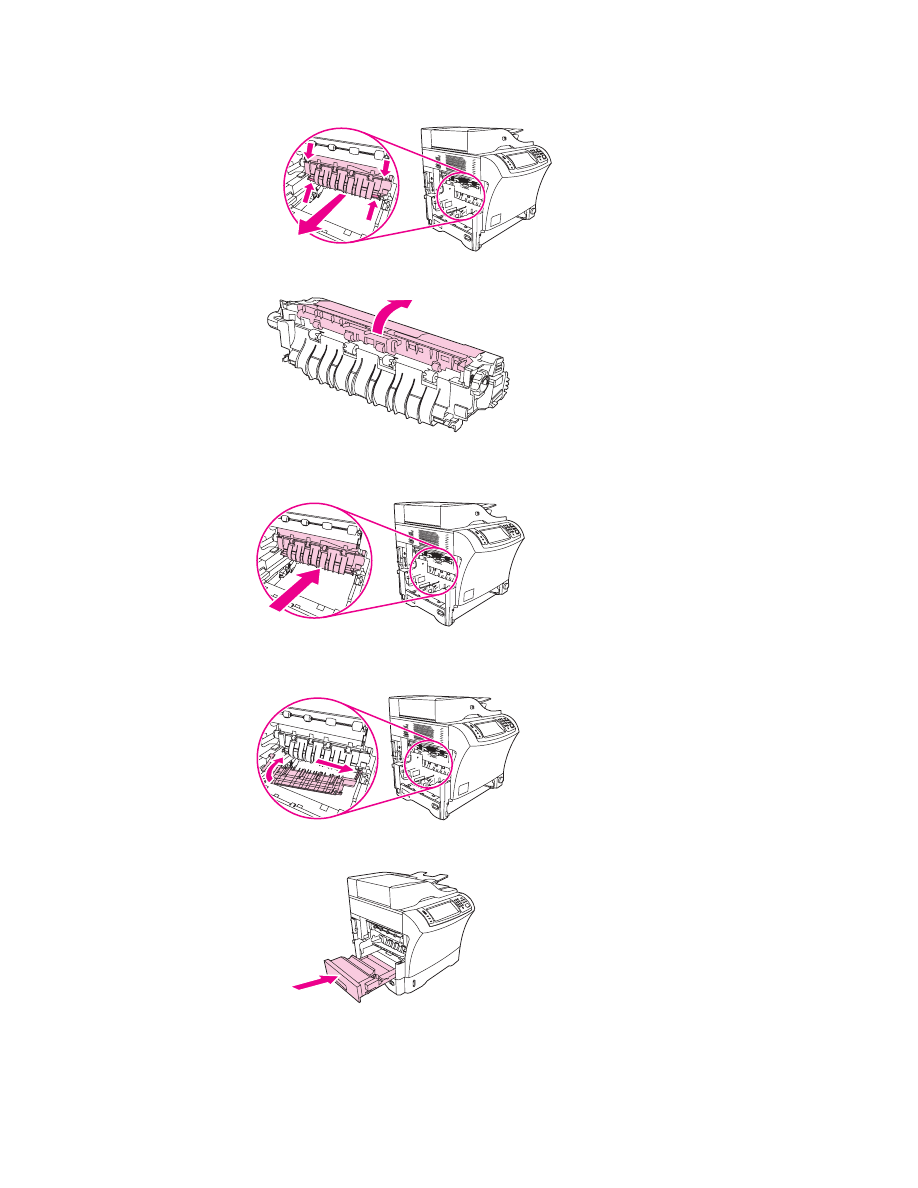
10. Open the black cover at the top of the fuser, and remove the jammed media.
11. Reinstall the fuser. Push on the fuser with your thumbs to be sure it snaps securely into
place.
12. To reinstall the fuser-entrance guide, first insert the right-side mounting pin into the hole
on the right side, and then lower the left-side mounting pin into the hole on the left side.
13. Reinstall the duplexer or the duplex cover.
ENWW
Clearing jams
197
14. Reinstall the output-bin assembly, the 3-bin mailbox, or the stapler/stacker. Insert the
device at an angle, and then slide it into the MFP.
15. If a jam message persists, jammed media is still in the MFP. Look for the jam in another
location.